This post may contain affiliate links. If you click and make a purchase, I may earn a small commission at no extra cost to you
Peanut Butter Chocolate Banana Bread
My husband is the most chocolate peanut butter addicted guy I’ve ever met – this one is for him.
Most of us love a warm slice of fresh banana bread. Add some chocolate chips for texture and a creamy whipped peanut butter frosting and it’s euphoric. This banana bread recipe doesn’t use artificial sweeteners, making it all the more appealing and guilt-free.
Let’s talk ingredients
Bananas – Did you know that as bananas ripen, the starches within them convert to sugars? This leads to a naturally sweeter taste. This increased sweetness enhances the overall flavor; this is why most baking recipes call for overly ripe bananas. Curious as to whether your bananas are too ripe to use in this recipe? Read Very Well Health’s article Brown Bananas: When to Eat Them and When to Toss Them
Peanut Butter – You can use a natural creamy or crunchy peanut butter for this recipe. I prefer creamy since the chocolate chips already bring a good texture.
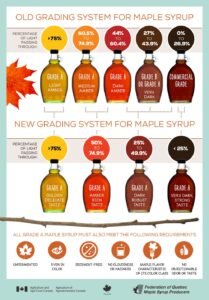
Maple Syrup – Everyone should have a high-quality maple syrup in their pantries. It is a great natural sweetener that can be used for baking, salad dressings, marinades, and more. If you didn’t know already, there is an entire grading system for maple syrup. It includes four different grades, each having its own flavor and purpose. Here is a visual chart courtesy of Maple from Canada’s website. Generally, Grade A Dark is preferred for baking due to its strong maple flavor.
Milk – I prefer using whole milk for this recipe. You can make it dairy-free by substituting any dairy-free milk of your choice.
Flour – You can substitute any gluten-free flour to make this recipe gluten-free. I prefer Bob’s Red Mill Gluten Free 1 to 1 Baking Flour, but you could also use King Arthur Measure for Measure
Baking Soda – I prefer using aluminum-free baking soda. It’s Just! is a great option for this.
Chocolate Chips – If you are going for a dairy-free bread, check to ensure your chocolate chips are also dairy-free, as most commercial chocolate contains milk products.
Butter – If you want a dairy-free bread, swap out traditional butter for a dairy-free or vegan butter substitute.
Banana Bread Tips
- Make sure you grab all your ingredients and equipment, and take a moment to read through the entire recipe before you start baking.
- Ensure your bananas are overripe, which means having numerous brown spots and a slight softness. This ensures the bread stays moist and sweet.
- Don’t overmix the batter. Think meatballs, the more you mix them, the tougher they are. Well, the same is true for our banana bread. We want to mix our ingredients until they’re just combined to avoid a tough, dense result.
- The best way to store this banana bread is in an airtight container in the fridge for up to five days (if it lasts that long!)
Recommended Equipment
Creamy Peanut Butter (or crunchy peanut butter if you’re using that)
Grade A Dark Maple Syrup (Golden and Amber are still okay to use, it just won’t have the same depth of flavor as the dark)
Ingredients:
3 large over-ripened bananas, mashed
2 eggs
1/2 cup creamy peanut butter (or crunchy peanut butter)
1/3 cup pure maple syrup
1/3 cup milk (sub. dairy-free alternative)
2 tsp vanilla extract
1-3/4 cup all-purpose flour (or sub. Measure for Measure Gluten-Free flour)
1 tsp baking soda
1 tsp cinnamon
1/2 tsp salt
1/3 cup chocolate chips, plus extra for sprinkling on top (sub. dairy-free if you are going for a dairy-free bread)
Fluffy Peanut Butter Topping
2 tbsp butter, room temp (sub. dairy-free or vegan butter)
2 tbsp creamy peanut butter
1/2 cup powdered sugar
1/2 tsp vanilla extract
1-2 tbsp of milk (this is to thin it out and help it fluff up) (sub. dairy-free alternative)
Directions:
- Preheat the oven to 350 degrees F. Grease the inside of a 9×5-inch loaf pan (I prefer using a glass loaf pan) with non-stick cooking spray or butter. Line the loaf pan with parchment paper (you can cut it to fit if desired).
- In a large bowl, combine the wet ingredients (including mashed bananas, eggs, peanut butter, maple syrup, milk, and vanilla extract) until well combined.
- In a separate large bowl, whisk the dry ingredients until they are well combined.
- Add the dry ingredients to the wet ingredients and mix until just combined. It is important not to overmix. Gently fold in the chocolate chips with a spatula, again, being careful not to overwork the batter.
- Add batter to the prepared baking pan. Bake for 45-60 minutes, or until a toothpick inserted into the center comes out clean. If bread begins to get too browned, cover the top loosely with foil to avoid burning for the remainder of the cooking time. Once removed from the oven, allow bread to cool in the pan for about 10-15 minutes. Remove bread from the loaf pan carefully and transfer to a cooling rack to finish cooling.
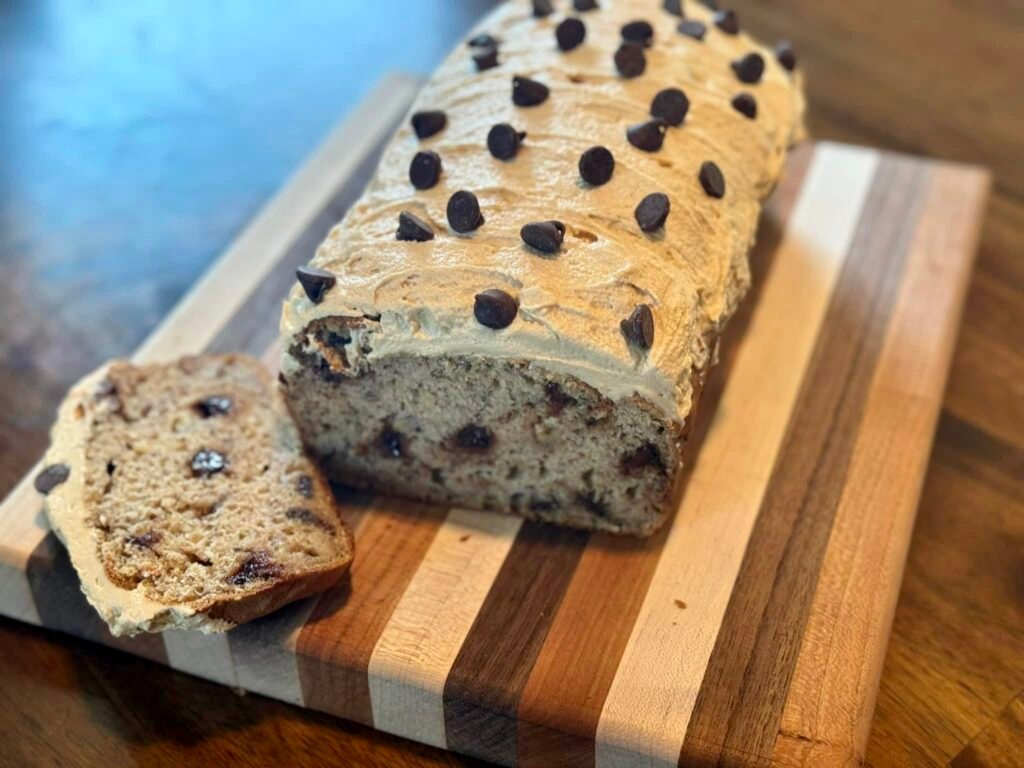
- While the bread continues to cool off, make the peanut butter frosting. Place the butter and peanut butter in a medium-sized mixing bowl. Using a handheld mixer, whip the butters on high until they are light and fluffy. Add the powdered sugar, vanilla and only 1 tbsp of milk to start. Beat slowly at first, then increase to a higher speed for about 2-3 minutes, or until the frosting is creamy and fluffy. If the frosting is not creamy enough, add more milk (1 tbsp at a time) until the desired consistency is reached, whipping with a mixer after each addition to maintain consistency. Spread frosting over the top of the cooled bread and sprinkle additional chocolate chips on top. Gently press the chocolate chips into the frosting to hold them in place.
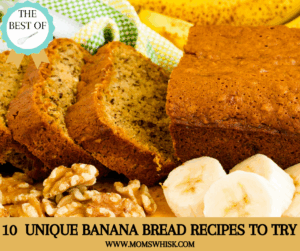
Banana bread is a versatile recipe. If you want more ways to take banana bread to the next level, read 10 Unique Banana Breads You Need to Try